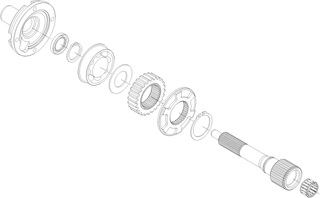
Year: 2011

  • RV Furnaces

    RV Furnaces

    FURNACES
    A major concern for RV’ers is a furnace quitting during the cold of winter. There are some basic checks before calling for service. Furnaces require a good 12-volt DC supply to operate. See the article BATTERY MAINTENANCE. If the furnace does not blow at all, check the fuse in the fuse panel. Many furnaces use a power switch and a circuit breaker located under the outside cover secured by two large screws or 4 small screws. Other models have these components located inside at the rear of the furnace, usually under a cover. If these checks pass inspection, most likely wiring connections, thermostat or the blower motor is defective. If it blows air and does not ignite properly, check that the LP gas system is operating
    properly. Turn on a stove to verify good operation. If the stove operates poorly, it can be an indication of a low LP gas level, which in cold weather will provide poor performance. See the article PROPANE GAS BASICS. Airflow restrictions caused by the vents being blocked will also cause the unit not to operate properly. If the LP gas has run out, has recently been filled or the gas valve has been turned off, try to turn the thermostat off and back on through several cycles to possibly self-bleed the air lock out of the LP lines.
    The Furnace’s theory of operation is as follows: The thermostat has a set of contacts that close when heat is required and open when the correct room temperature is obtained. When the thermostat contacts close they connect a set of wires together at the furnace, this activates a time delay control that activates the fan motor. The air movement from the fan activates a sail switch contacts that close, sending a signal to the DSI control board. After a short delay, the DSI control board opens the gas valves and sends a high voltage spark to the electrode located by the burner. The DSI module should sense a flame through the electrode. If a flame is not sensed, the furnace will lock out until the thermostat is reset. Older systems will continue to blow air and newer units will quit blowing until the thermostat is reset. When a furnace fails to start, some of the most common failures are: a blown fuse, tripped circuit breaker, defective wiring connections or a defective thermostat. If it will not ignite properly, the most common component failures are: a defective DSI module, blower motor, electrode or sail switch. DSI modules are known to cause intermittent operating problems that are often hard to diagnose. Humidity, heat and cold may cause an intermittent failure due to expansion and contraction.

    We hope the information provided can help you locate and correct the problem. Safety should be of major concern when dealing with LP propane gas and carbon monoxide. If the furnace is not working properly after performing these basic tests, it is best to contact a qualified professional to properly diagnose and repair the furnace at (850) 866-6999 or visit https://rvtrax.com .

  • RV Air Conditioners

    RV Air Conditioners

    RV AIR CONDITIONERS
    Air Conditioner (A/C) questions and problems are very common to most RV’ers. Often, with little maintenance these units provide many years of efficient operation. Most RVers complain that the A/C is not cooling the way that it should and ask for it to be recharged. Most all RV air conditioners are factory-sealed units and these units should never require recharging, unlike your automobile or RV dash air. Most recreational vehicle A/C units are very similar, with only minor differences. The most prevalent problem with recreational vehicle A/C units is a dirty filter which reduces air flow and causes dirty evaporator coils, freezing up and efficiency problems, to name a few. Diminished cooling performance is usually a dirty evaporator coil from lack of filter maintenance or smoking indoors. The evaporator coils can be seen with a light, when the filter is removed. They are vertical coils and fins that look similar to a silver radiator when clean. When dirty, they appear gray, brown or black, and in severe cases, it looks like a cloth blanket covering the coils. Dirty coils greatly reduce the efficiency of the A/C unit and it can also cause the compressor to overheat. The evaporator coil must be clean to properly conduct the heat from the air. A qualified professional technician should clean dirty coils. The process is complicated and requires service from the roof, special caustic cleaners and partial dis assembly of the A/C unit. Recreational vehicle A/C systems are designed from the factory not to be recharged for the life of the unit; therefore the Freon levels cannot be checked easily. There are only two common performance tests using thermometers and an amp meter. The RV’er can perform a temperature performance test with two thermometers. One is
    used for ambient room temperature going into the A/C filter and the other thermometer is to measure the cool air exiting the discharge vent closest to the A/C unit. The A/C should be set to maximum cold and should run for at least 30 minutes. The factory specification is approximately 20°F cooler air exiting out the discharge, than the ambient room temperature entering into the filter. Air conditioners only remove the heat from the air, so if your RV temperature inside is 90 degrees the discharge temperature would only be approximately 70 degrees.
    Most RVers, coming from a cooler and drier climate, complain about poor A/C performance in a hot and humid climate. The RV itself can be the problem. Lots of windows, vents and poor insulation will result in uncomfortable conditions. Remember the A/C discharge temperature is only 20 degrees cooler than the inside temperature. Parking in a shaded area and closing window shades will help overcome this problem. The RV may require a larger or an additional A/C unit. Operating the A/C in extremely humid conditions will also reduce efficiency due to water droplets on the evaporator coil acting like an insulator, reducing air to coil contact. Closing off vents and restricting the
    airflow will also reduce efficiency. A/C units sometimes freeze up at night in high humidity conditions when fan speed is set to low. Operate the fan speed on high when operating in these conditions.
    If the A/C condenser coils, which are located on the roof at the outside rear of the A/C, are clogged, damaged or bent, it will greatly reduce efficiency.
    Another common problem is the 30 or 50 amp voltage supply being too low. Operating voltage should be at least 105 volts AC. A dirty plug connection, using a long or small extension cord, electrical adapters or a burnt shore power receptacle outlet are the most common causes of compressor overheating and failure. Never use a 15/20 amp electrical adapter when operating an A/C unit. A 30-amp service is only capable of
    running one A/C unit. A 50-amp service is required to run two or more A/C units.
    Basement central air units have two compressors and should always use a 50-amp service or have a power management-shedding device to disable one compressor when operating on a 30-amp service.
    It is recommended to have a receptacle mounted volt meter for 30 amp service or two receptacle mounted volt meters on different circuits to monitor the line voltage for 50 amp service at all times. You can easily see low or high operating voltages to your RV. Many campgrounds have inferior wiring and worn out receptacle outlets. Another great alternative is to have a line conditioner surge protector installed in your RV or an external surge protector that your RV outlet can plug into. A 50 amp unit is especially susceptible to major damage to all the electrical appliances and accessories from an over voltage condition caused by a bad common outlet terminal. A line conditioner and surge protector can save you lots of money and headaches.
    Most A/C units have a thermostat and a control board that require a good 12-volt DC supply and 120 volts AC to operate. If the unit does not turn on, check the AC circuit breaker that supplies the A/C unit. Reset it, if necessary, by firmly pressing it completely off, then press back to the on position. A good indicator of a good 12-volt DC supply is to listen for a clicking sound from the control board when the A/C thermostat is turned on. The board is usually located above the A/C filter. If a click is not heard, check the 12 volt DC fuse in the fuse panel or verify that you have a good 12
    volt DC supply as described in the article BATTERY MAINTENANCE.
    Some RV’ers complain of water intrusion around the A/C unit from rainy weather. A poor seal between the A/C unit and the roof can cause this. This gasket will compress over time and require an occasional tightening. It can be tightened by accessing the 4 bolts facing down located in the four corners when the filter cover and housing are removed. The gasket can be inspected at this time. If it is less than ½ inch thick, it should be replaced. Do not use excessive force or distortion of the A/C sheet metal can result in fan motor binding or produce noises. While the cover is off it is recommended to flood the roof with water to inspect for leaks. If it continues to leak the gasket must be replaced, because it has compressed too much. Never attempt to use a sealant to glue down or glob around an A/C unit. This can ruin a roof as well as making removalof the A/C unit almost impossible.

    Remember that no person should ever attempt repairs on a RV air conditioner without proper training, licensing, tools and access to the correct technical information. Hopefully, this information has been of great value to you. If you have performed these tests or do not understand how to perform these tests, and your A/C unit is not performing properly, it is time to call a qualified professional at (850) 866-6999 or visit https://rvtrax.com to correct the problem.

  • RV Water Heaters

    RV Water Heaters

    PILOT MODELS
    If your pilot model water heater is not operating properly, first check if the stove or other gas accessories are working, to verify proper gas operation. Sometimes these units have an air lock that will require an extended pilot lighting procedure. The gas valve being turned off for an extended period of time or an LP tank that has been removed to be refilled usually causes this. The pilot models use a gas control valve, burner and a thermocouple. The thermocouple, which senses the pilot flame, is a very small tube that runs from the lower portion of the gas control valve to a bracket located at the pilot flame. If the pilot lights when the gas valve is pressed but goes out when the gas valve is released, it may not be inserted into the pilot flame properly or the thermocouple is defective. Another common problem is that the ECO (Emergency Cut Out) has failed.This will require that the entire gas valve be replaced. There are other tests that can be performed by a qualified technician.

    DSI MODELS
    “Atwood” and “Suburban” are the two manufacturers of DSI (Direct Spark Ignition) water heaters in the RV industry today. There are only minor differences between the two. It would be difficult to get into specific detailed technical troubleshooting and repair techniques. We will answer some common questions and complaints that the average RVer can easily address. DSI models require a good 12-volt DC power source to operate. For details, see the article “Battery Maintenance”. Check the monitor panel for good supply voltage. Also, verify that the fuse for the water heater is good. The second test is to check if the stove or other appliances are operating to verify proper LP gas operation. For additional information see the article “Propane Gas Basics“. If these tests pass, check the following:
    1. Always turn off the 110 Volt AC water heater switch or circuit breaker, if equipped with electric operation before servicing any water heater.

    2. Unplug the electrical connector to the DSI Module Board and inspect the terminals for corrosion, then clean if necessary. Reinstall the connector. This board is usually black in color. Depending on the model, it can be located outside under the water heater cover or inside behind the water heater inside a cabinet, with a plastic cove rover the module if located inside.

    3. All water heaters use a thermostat and an ECO (Emergency Cut Out) or high limit switch. Some models use a reset switch and can be reset by simply pressing the black rubber push button or a small pin type button located on the ECO switch. Some models also use a heat fuse that has a terminal on each end inside a clear plastic tube and can fail.

    4. DSI models have a switch and a red light for LP gas operation located inside the RV. On most models the light should turn on momentarily until the water heater is lit. On all models if the light comes back on or stays on, this indicates a lock out problem and the unit will not operate. If this occurs, turn the switch off and back on to see if it is operating properly. This can be tried several more times. Air that may be in the LP gas system should self-bleed with this process. Air in the LP gas system can enter when the LP tank valve is closed for an extended period of time or the LP tank
    has been refilled. If your water heater still will not operate, seek professional assistance.

    Some important tips to follow for all models are:
    1. Never operate your water heater in gas or electric operation if the tank is empty. To properly fill your tank, open a hot water faucet, with a pressurized water supply connected, until all of the air has escaped and clear water flow is present. Do not open the T&P valve to fill.

    2. You should drain the water heater monthly to flush out corrosion. Turn off the water heater and supply before removing the drain plug. Open the T&P valve lever located on the top exterior of the water heater, this will aid in faster drain time. Always snap this valve closed and reinstall the drain plug before refilling the tank. Some models use an anode rod as part of the drain plug. This rod should be replaced if it is more than 50% deteriorated. Open a hot water faucet to refill the water heater.

    T & P VALVE
    This is a temperature and pressure safety valve. It is designed to release water pressure if the water temperature exceeds 210°F or if the pressure within the tank exceeds 124 to 150 PSI. Weeping or dripping at the valve while heating does not necessarily mean that the valve is defective. All water heater tanks require an air gap because water expands as it is heated. Never open the lever on the T&P valve to fill the tank. If the valve is leaking, turn off the water heater, water supply and allow cooling time to avoid burns. Remove the drain plug and open the T&P valve lever to aid in
    quicker draining of excess water in the tank. Reinstall the drain plug and snap the T&P valve lever closed. Turn on the water supply, open a hot water faucet to expel all the air until clear water flow is established. Turn the water heater back on. If the leak reoccurs the T&P valve must be replaced.

    SOOT
    You should occasionally check the exhaust and flame of your water heater while operating in the LP gas mode. Always check this if your unit has been in storage. The flame can be seen when the exterior cover is opened and it should be a nice blue color. If the flame is yellow or orange, the water heater should be shut off immediately in the LP gas mode. It can still be operated in the electric mode. A common cause of an orange or yellow flame is a spider web or obstruction in the burner tube. Other causes are, a dirty orifice, restricted flue tube, misaligned burner, flame spreader, obstructed
    exhaust grill or an improper air adjustment. Most RVers do not have the proper training or tools to address these concerns. You should seek professional assistance to correct the problem.

    ROTTEN EGG SMELL
    Some RV’ers have complained about a rotten egg smell in the hot water. It is most commonly caused by sulfur in the water. It can also be caused by an electro-galvanic action of the water heater tank or even the anode rod. Bacteria can also cause this. The best process to correct this condition is as follows:
    1. Turn off the water heater and water supply. Allow cooling to avoid burns. Releasethe water pressure by opening a hot water faucet then close after the pressure is released.

    2. Drain the tank by removing the drain plug. Open the T&P valve lever to aid in draining. Once it has drained, snap the T&P valve lever closed.

    3. Turn on the water supply and allow plenty of clean pressurized water to flush the sediment out of the tank drain. Compressed air can also be used to agitate the sediment or in severe cases, you may also use a stiff wire through the drain hole to break up the sediment. Be careful not to damage the threads. Reinstall the drain plug when completed. Refill as outlined above, or continue to step 4.

    4. Flush the entire system as described in the article WATER SYSTEM SANITATION.

    5. For major smells, you can add 2 parts of distilled vinegar to 1 part water. This takes a lot of distilled vinegar. To do this reinstall the drain plug and open a hot water faucet to vent. Screw or install a rubber hose into the T&P valve with the lever open and insert a funnel into the open end of the rubber hose. Pour the vinegar and water solution through the funnel until the tank is full. Let it soak for at least 2 hours.

    6. Remove the drain plug to drain all the solution from the tank. Snap the T&P valve lever closed and turn off the hot water faucet. Turn on the fresh water supply, and allow plenty of water to flush out the solution from the tank. Turn off the water supply, reinstall the drain plug, and open a hot water faucet. Turn on the water supply and allow all air to escape from the faucet until clear. Turn the water heater back on.

    We have tried to address many of the common problems associated with water heaters. You should be aware of your own capabilities. This article is not intended to take the place of professional detailed technical training. If you would like to have a qualified professional correct these problems, call (850) 866-6999 or visit .

  • Tire Failure

    Tire Failure

    TIRE FAILURE
    After examining hundreds of RV tire-failures over the years, we have discovered that most tires are under rated for the overloaded weight of the RV. Tire manufacturers also recommend replacing the RV tires after five to seven years of service or if any tire cracking is present. Low or excessive tire pressures can result in catastrophic damage or loss of life. Tire ratings are engraved in the sidewall, along with a corresponding maximum cold inflation pressure.
    To increase tire life and safety, each wheel must be weighed individually when the vehicle is fully loaded. These weight measurements will determine how much tire pressure is required for a specific load. Tire manufacturers publish charts that establish the tire load capacities at various inflation pressures. This is required to achieve optimum tire performance. All tires on the same axle should be set based on the heavier side. If there is a major difference in side-to-side weight, the load needs to be redistributed.
    If any wheel weight exceeds the maximum tire load, the problem must be corrected immediately. Shifting the loads in your RV or upgrading the tires not to exceed the load rating of the wheel rim can remedy this.

    Remember, safety is your responsibility. For more information you can call a qualified professional at (850) 866-6999 or visit https://rvtrax.com

  • Propane Gas Basics

    Propane Gas Basics

    PROPANE GAS BASICS
    The propane (liquid petroleum) gas system is very important in a RV. The system is safe and reliable when maintained and used properly. Following are some basic tips:
     When opening a LP tank valve, open by turning very slowly. This will prevent a sudden surge of pressure into the regulator, which can blow out the diaphragm. The regulator is a vital part of your LP system. A malfunction can cause many problems.
     Listen for a constant hiss or hum at the regulator after opening the valve. This is an indication of a major leak. Propane has a rotten egg smell and if this smell or a constant hiss is present, you must turn off the gas immediately and have it checked
    by a qualified professional at (850) 866-6999. The valve should be opened all the way for normal operation.
     Periodically check tank connections and fittings for leaks and each time the tanks are disconnected or filled. This is a simple test to perform. You may purchase a Liquid Leak Detector Solution at most RV supply stores, and then spray this soapy solution onto the fittings. If any bubbles are present, a leak is indicated. Repair the leak and re-test.
     Always use a POL plug or cap in your LP cylinders when disconnected or transporting LP tanks. Never transport a LP tank in a passenger compartment of your vehicle. The area around the tank must always be properly vented.

    For more information about your recreational vehicle LP gas system, you may call 1-800-877-2495 and ask for a copy of “What You Should Know About Your LP Gas System”. For repairs call a qualified professional at (850) 866-6999 or visit https://rvtrax.com

  • Basic Propane Leak Test

    Basic Propane Leak Test

    Basic Propane Leak Test

    The LP Propane system is very important for appliance operation of your RV. It has the potential to be explosive and deadly. Never smoke or have any ignition sources present when filling or servicing a LP System. The propane system must be inspected regularly to avoid unsafe and dangerous conditions. Liquid Propane is very safe and convenient if all safety precautions are followed. Propane has a very small window of opportunity for ignition or explosion. A precise mixture of 2.15% to 9.6% LP gas mixed with air is required for ignition. A 25 to 1 air fuel mixture is required for proper ignition. Any less, or any more LP fuel mixture than that, it will not ignite, so it is considered a very stable fuel. Propane is 1.5 times heavier than air so it always settles at low points. This is why a properly installed RV LP Leak Detector is located at floor level.

    Any rotten egg smell is an indication of an LP leak. This rotten egg odor is caused by a chemical called Ethyl Mercaptan, that is mixed in the LP gas at a rate of 1 Lb. Per 10,000 gallons of LP. The initial Rotten egg smell is noticed at 1/5th the LP element level of flammability.

    A propane leak test can be performed in a few minutes, by a certified LP technician. Basic leak test can be performed by you. If you have a fifth wheel or travel trailer equipped with a Automatic Change Over Regulator, a simple test can be performed. Turn the main LP Gas Valve to the on position and listen for the initial PSST sound. After a second or two, the sound of flowing LP should stop. Next step is to notice the green band in the clear regulator cap. Now turn the main LP gas valve off at the LP tank for 3 to 4 minutes. Watch the green band in the clear regulator window, and it should stay green. If it turns red, (low gas indicator), this indicates a possible leak. A inline tank level pressure gauge can be used for most every other application. These gauges have a pointer needle that can be watched after performing the steps above. If the pointer drops, a leak is present.

    Most leaks are at the LP Regulator, or fittings. Pinpoint location of an LP leak can be found by turning on the LP gas and using a spray bottle filled with a LP Leak Solution, or MR Bubbles soap solution. A electronic LP Leak Detector is inexpensive and can be used to locate LP leaks. Simply spray all the fittings,regulator, hoses, and LP joints at all the LP Appliances with the leak or soap solution, or slowly pass over with the electronic leak detector. Any presence of bubbles or a beep indicate an LP leak. Turn off the LP valve and inspect the leaking fitting for cracks. If the fitting appears satisfactory, simply tighten the fitting. Turn on the LP gas valve and repeat the steps posted above.

    It is very important to remember that any LP leak is dangerous and is not acceptable. A regulator lock out and pressure drop test should be performed by a Qualified RV Technician to assure proper operation of the LP system.